
Quick Start
Get started with Paygent in less than 5 minutes. Choose your SDK and start tracking AI usage immediately.
Step 1 — Get Your API Key
Sign up at withpaygent.com and get your API key from the dashboard.
Step 2 — Install the SDK
Python
Node.js
Go
Step 3 — Set up Agents and Indicators
Define your AI agents and the indicators (actions) they’ll track in the Paygent dashboard. For example, create a chatbot-agent agent and a message-sent indicator.
Common Examples:
- Agent:
customer-support-bot→ Indicator:message-sent - Agent:
sales-assistant→ Indicator:meeting-booked - Agent:
content-generator→ Indicator:article-generated
Creating an Agent
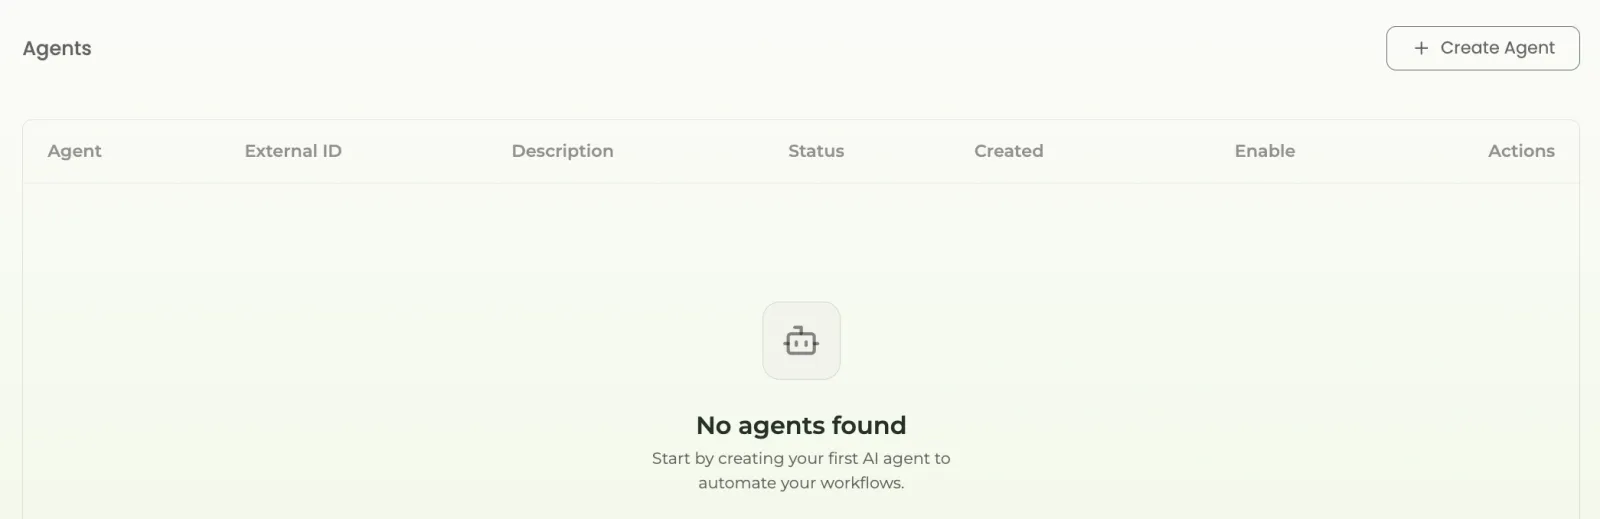
Step 1: Go to Paygent dashboard and click on “Create Agent”
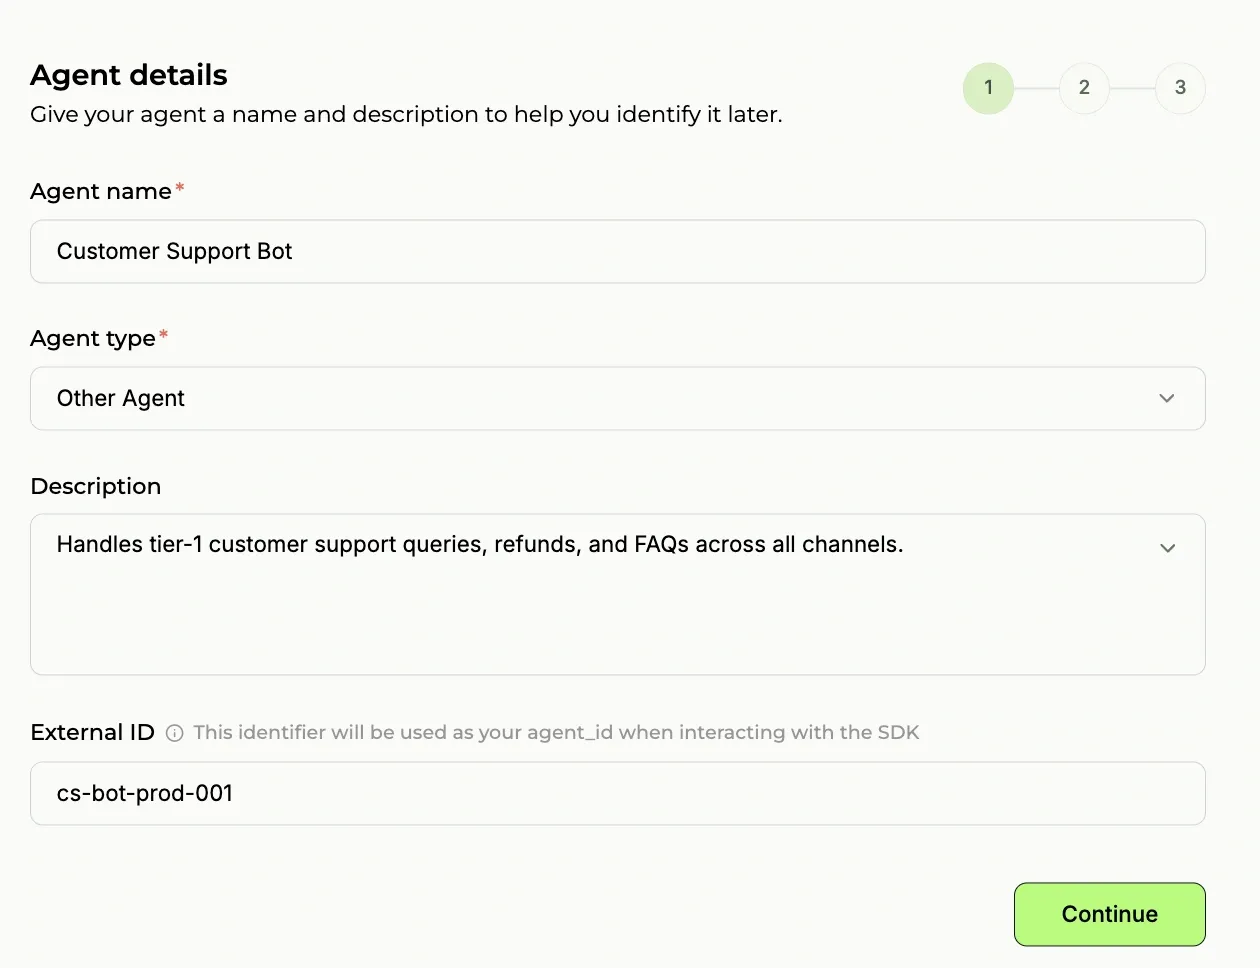
Step 2: Give agent name and external ID. External ID is important, Select other agent
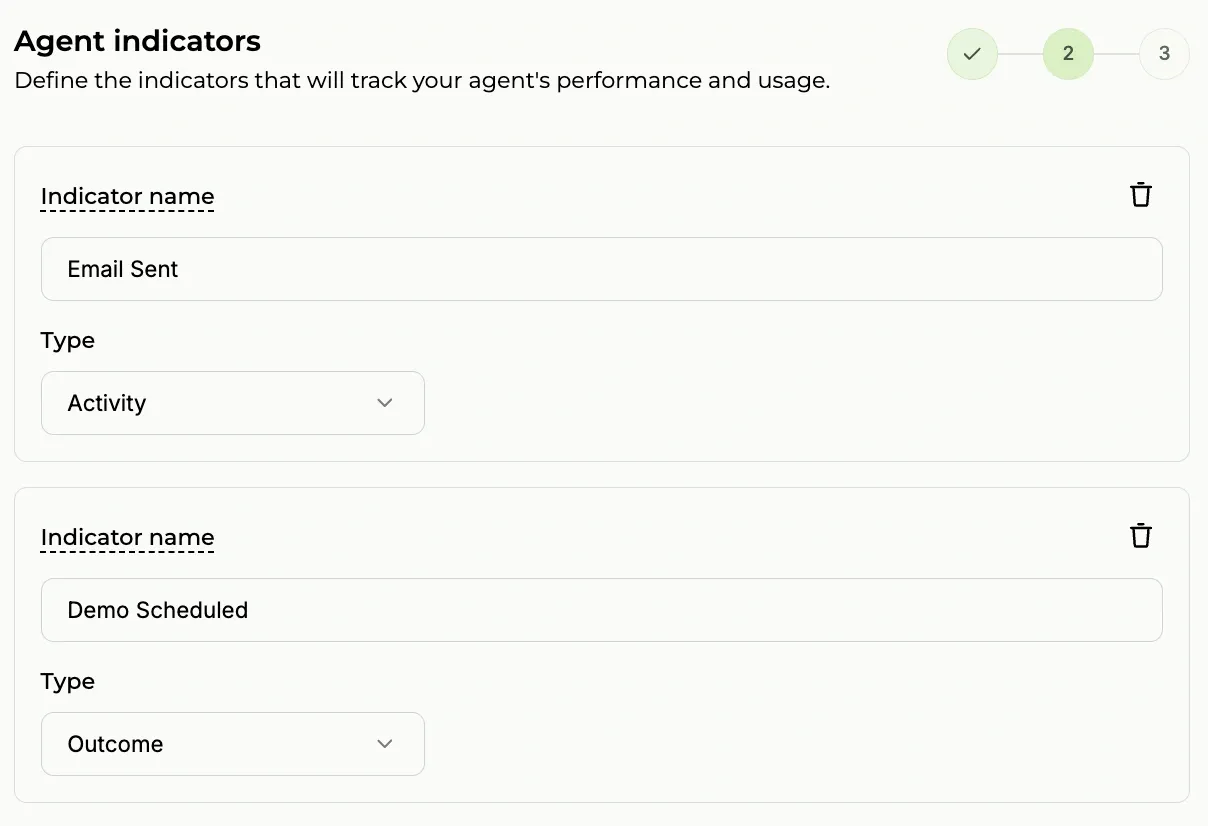
Step 3: Create indicators. Indicators can be activity-based or outcome-based
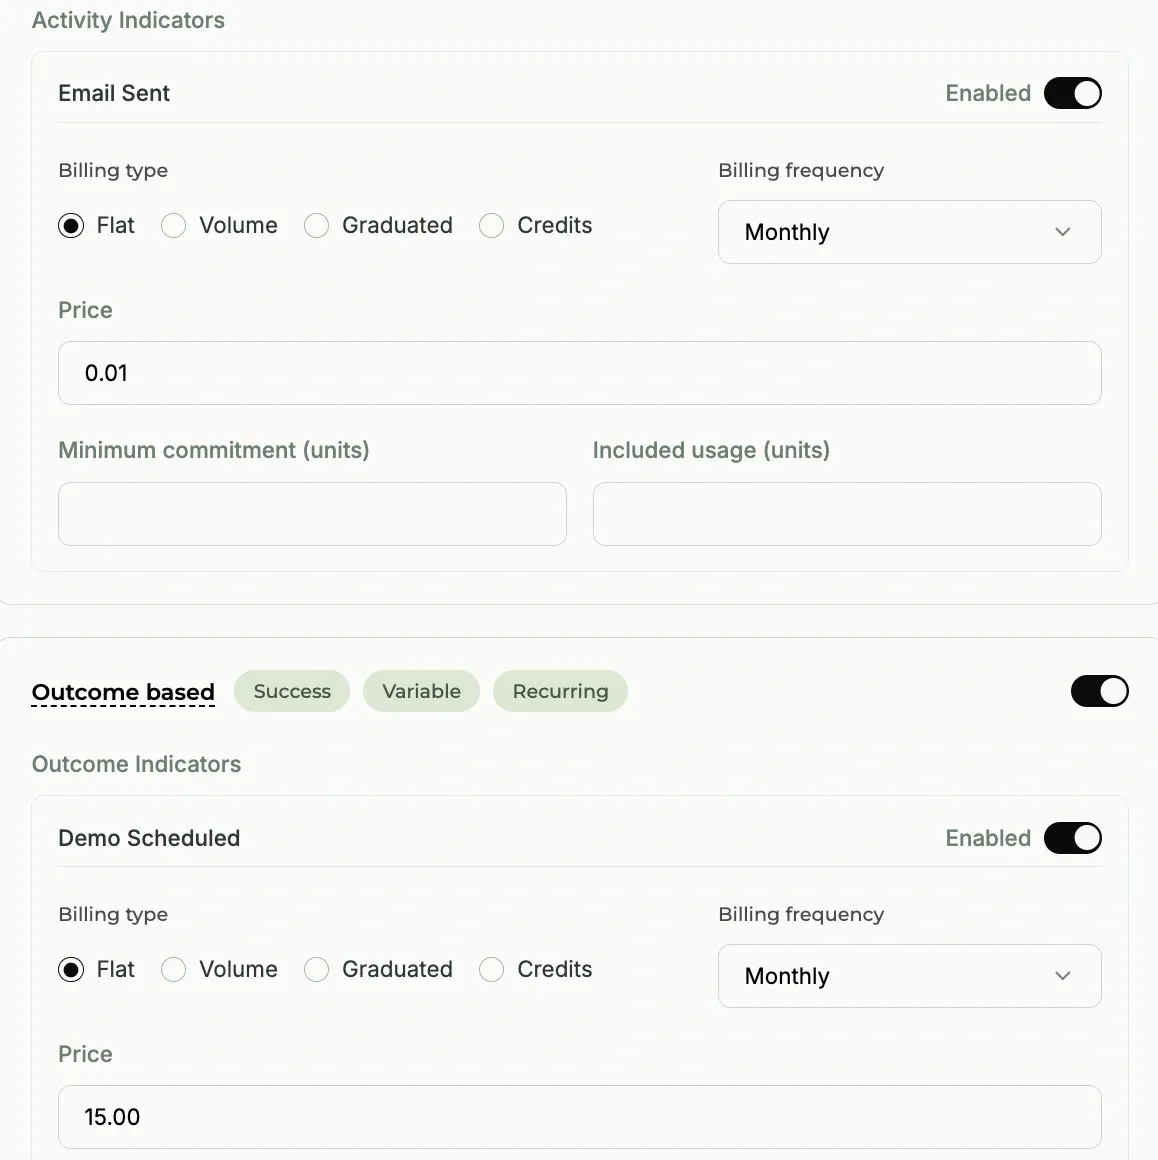
Step 4: Define your pricing. For example, in the image it’s $2 per call
Step 5: Your agent is created successfully!

Creating a Customer
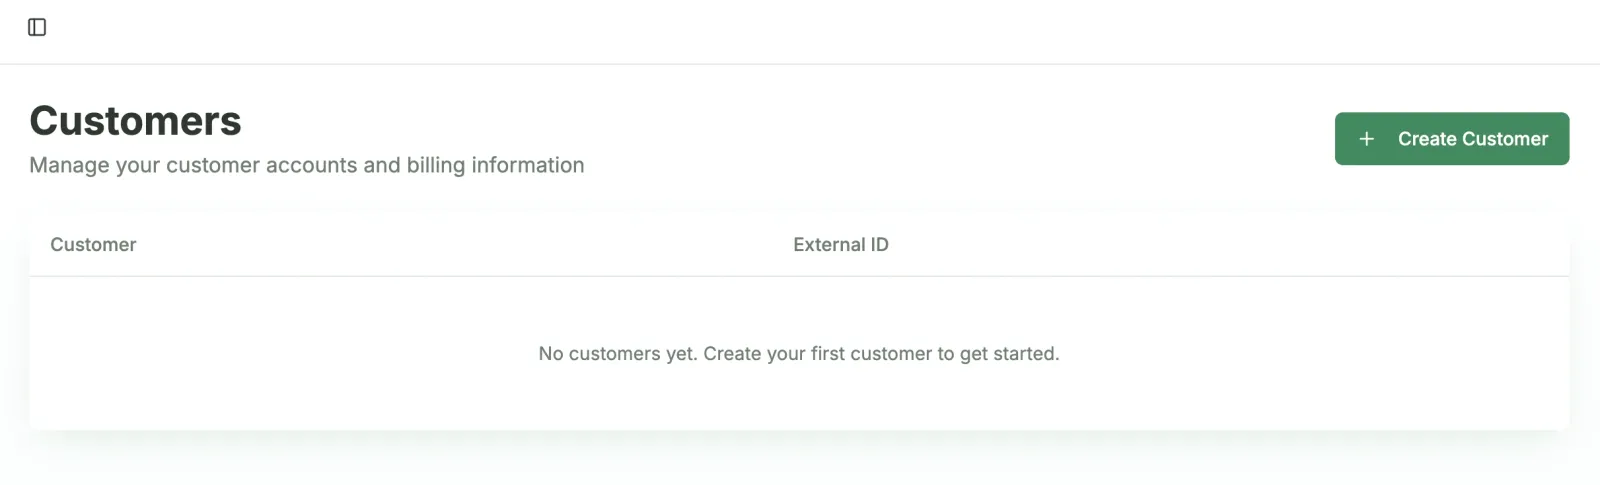
Step 1: Click on “Create Customer”
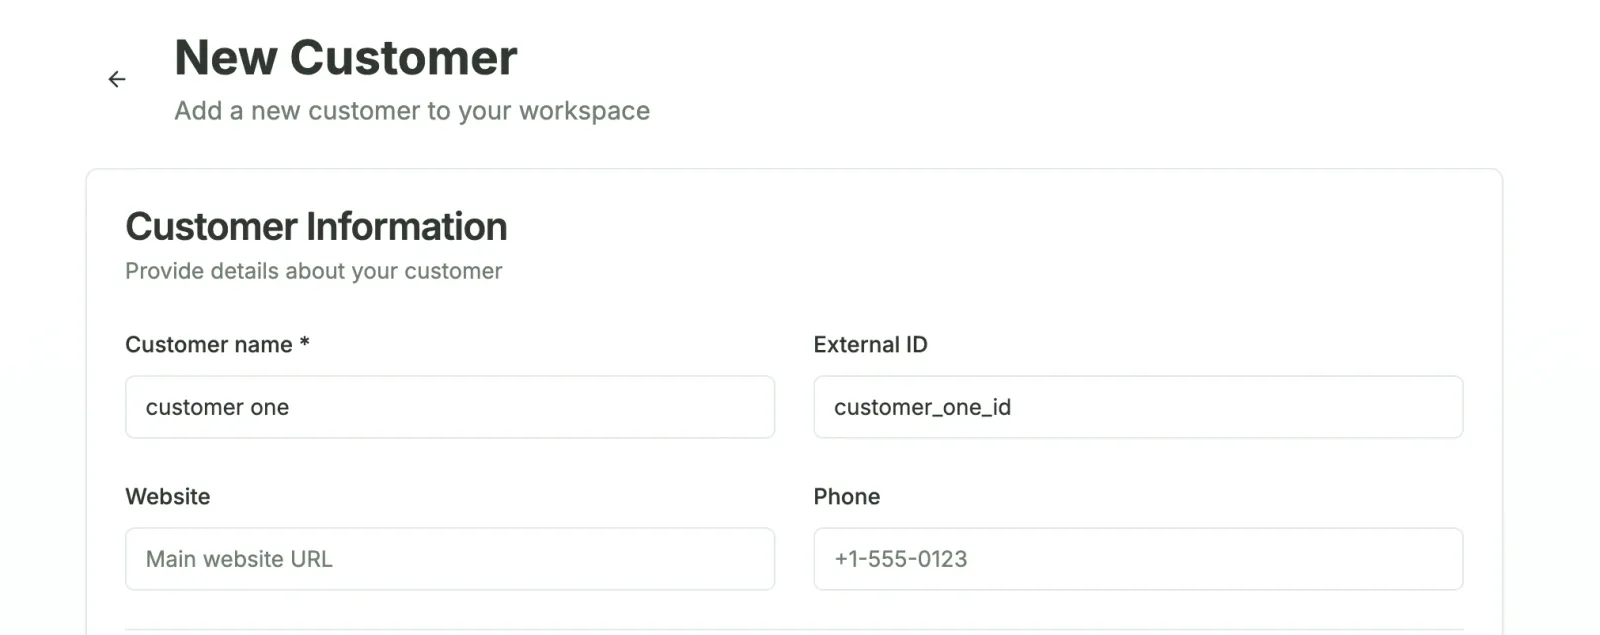
Step 2: Define customer and external ID. Tip: Always use your database customer ID as external ID
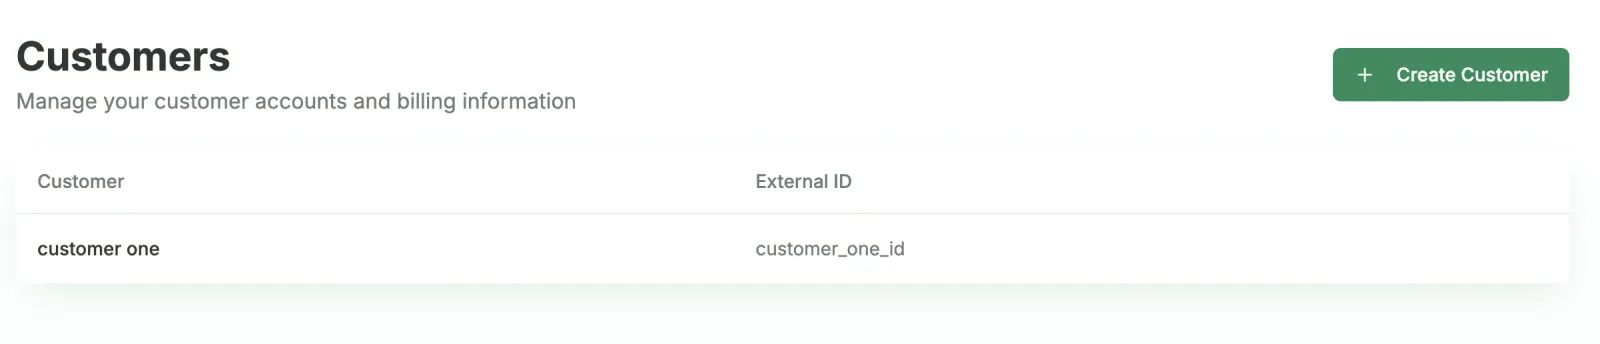
Step 3: Customer is created successfully!
Step 4 — Send Your First Usage Data
Python
Node.js
Go
The simplest way to track AI usage in Python is by initializing Paygent at the start of your application. This automatically instruments supported LLM clients.
Step 5 — Create an Order (enable billing)
Usage tracking alone does not invoice customers. Create an order to start automatic billing:
- Orders → Create Order
- Select your customer and set billing day / payment terms
- Add line → pick your agent (optional: select a Plan)
- Click Done, then open the order and click Activate
Only active orders generate invoices on the billing schedule.
Optional before billing: Credit currencies for prepaid/postpaid, Taxes on the order, External costs for pass-through charges.
Step 6 — Monitor & Bill
View real-time usage in Dashboard → Agent Analytics. On each billing day, Paygent generates itemized invoices from usage, subscription fees, external costs, and taxes.
Send the invoice PDF, generate a Stripe payment link, or mark as paid to release pending wallet credits.
That’s it! You’ve integrated Paygent end to end: SDK → usage → order → invoice.
Next steps:
- How It Works — full integration map
- Plans — tiered pricing packages
- Credits & Wallets — prepaid credit packs
- SDK docs for automatic tracking and error handling