
Voice Agent Setup
Setting up a voice agent in Paygent is a streamlined 4-step process. Once configured, you’ll be able to track granular metrics like STT minutes, LLM tokens, and TTS characters with precision.
Step 1 — Initialize Creation
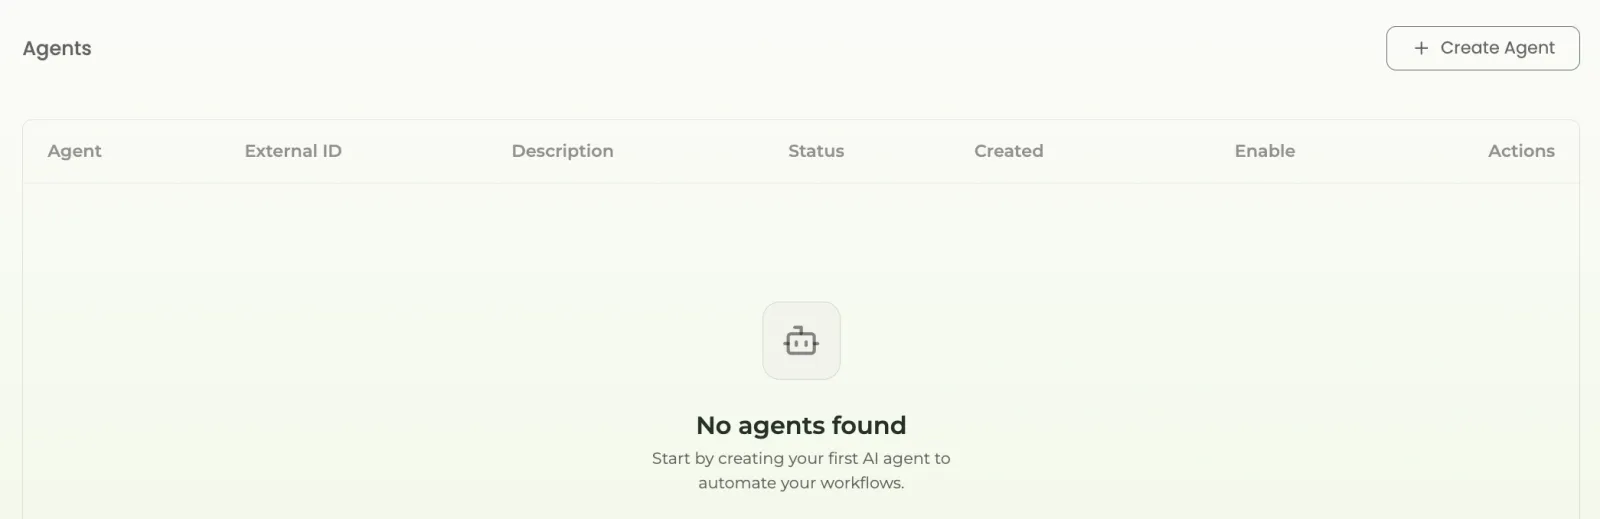
From your dashboard, navigate to the Agents tab and click on the ‘Create Agent’ button to begin the setup.
Step 2 — Define Agent Identity
Provide a descriptive name and a unique External ID. This ID will be your primary identifier in the SDK and API calls.
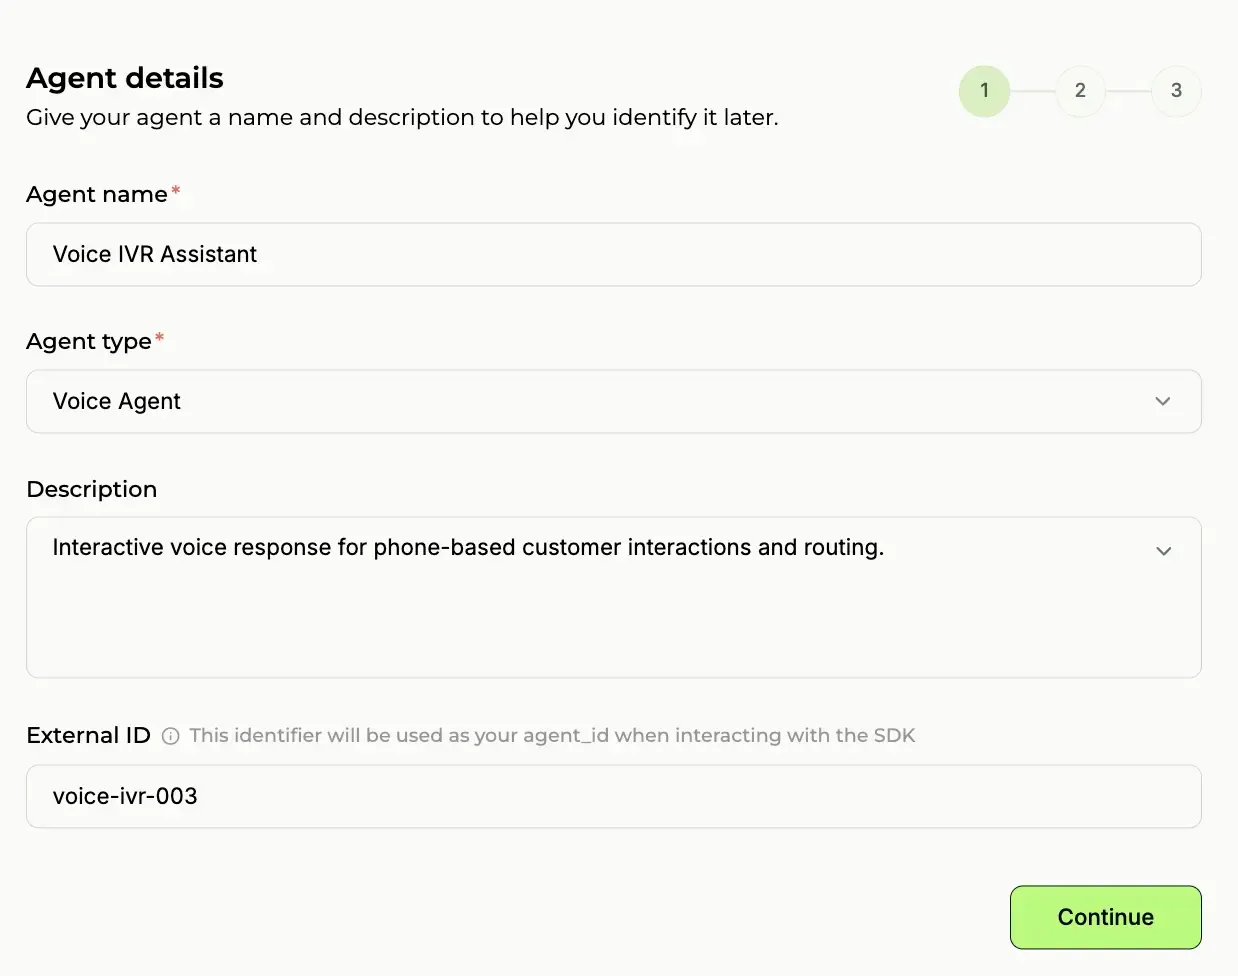
Pro Tip: Use the same ID you use in your own database for seamless mapping.
Step 3 — Configure Activity Indicators
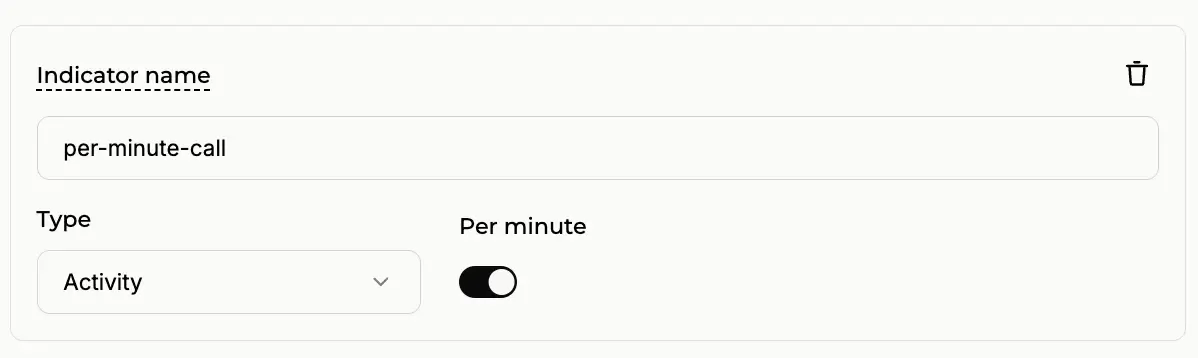
Define the events you want to track. For voice, this usually includes voice_call_completed or stt_usage. You can define indicators like this to track specific activities.
Step 4 — Set Pricing Logic
Voice agent companies typically charge based on call duration. You can choose between a fixed price per call or a per-minute rate. For the industry standard, select ‘Per Minute’ and define your cost per minute (e.g., $0.15/min).
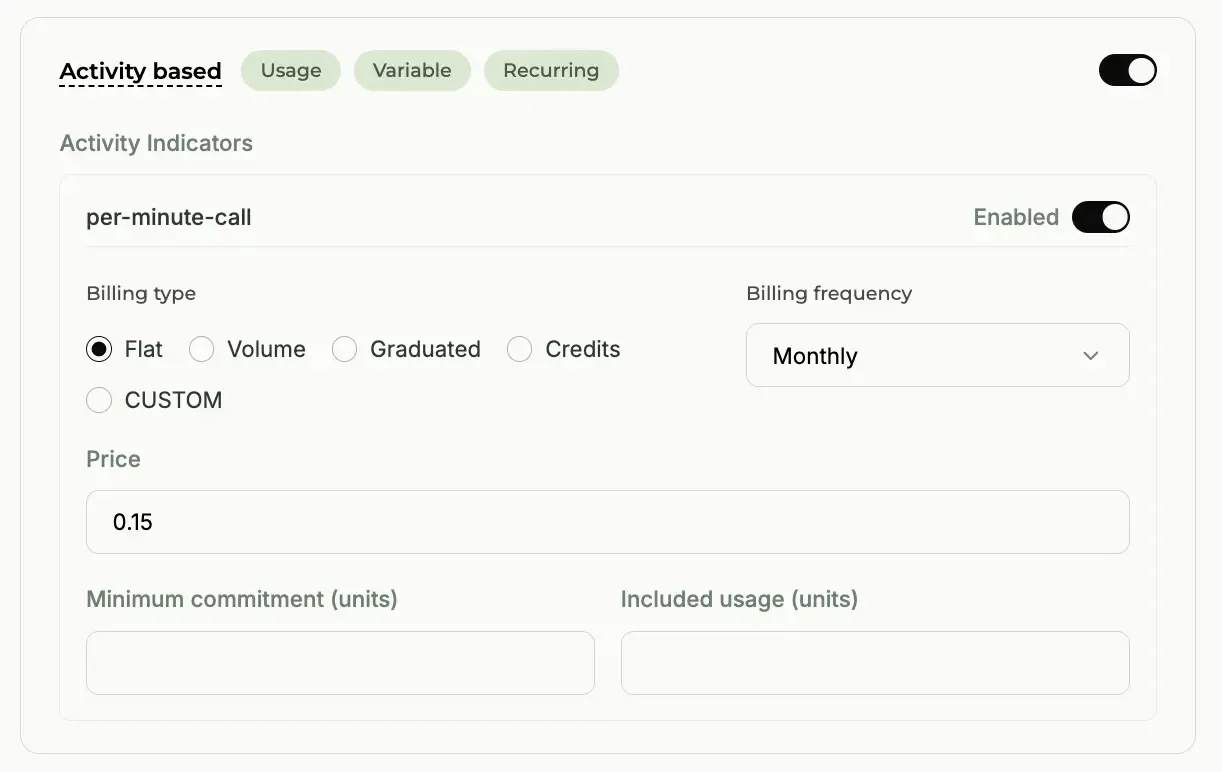
The per-minute model is recommended for voice agents to ensure your revenue scales with usage.